

How to Re-Sharpen Button Bits: Complete Step-by-Step Guide for Maximum Bit Life
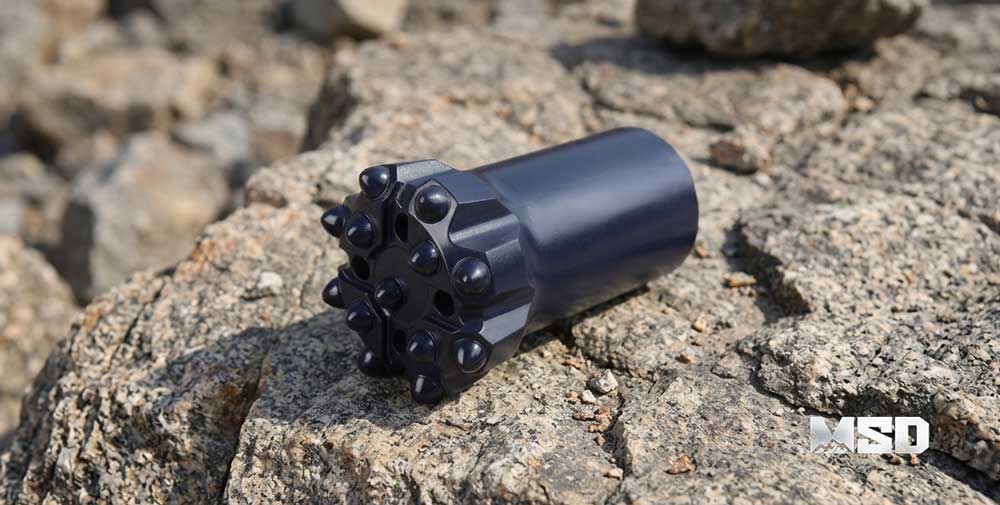
Why Re-Sharpening Button Bits Matters — The Economics of Carbide Maintenance
Re-sharpening button bits is the single most cost-effective maintenance practice in top hammer drilling. A properly timed resharpening cycle restores penetration rate, extends total bit life by 30–50%, and reduces the per-meter drilling cost significantly. Yet many drilling crews skip resharpening until performance has already degraded beyond recovery.
The economics are straightforward. A new button bit represents a fixed tooling investment. Each resharpening cycle requires only a diamond grinding cup and 10–15 minutes of labor — a fraction of the replacement cost. Based on feedback from 1,000+ drilling contractors across 40+ countries who use MSD button bits, crews that implement disciplined resharpening programs consistently achieve more drilled meters per bit than those who run bits to failure.
Penetration Rate Decline from Worn Buttons
Worn buttons drill slower. As a tungsten carbide button develops a flat wear surface, the contact area against rock increases, and the energy per unit area decreases. The result is a measurable drop in penetration rate — typically 15–20% once the wear flat reaches 1/3 of the button diameter, and 30–40% at 1/2 diameter flat.
This decline affects more than just drilling speed. Reduced penetration rate means the drill string spends more time in the hole per meter, increasing wear on construction drilling components, consuming more compressed air, and generating more heat at the bit face. The cumulative cost of running worn buttons far exceeds the cost of resharpening.
Cost Savings — Resharpening vs. Replacement
A single button bit can typically undergo 5–8 resharpening cycles before retirement, depending on rock conditions and button size. Each cycle restores near-original button profile geometry and penetration rate. Over the full life of a bit, disciplined resharpening can effectively multiply the drilled meters by 2–3× compared to running a bit to failure without maintenance.
For drilling contractors operating fleets of top hammer drilling tools, the aggregate savings across dozens or hundreds of bits per project are substantial. Resharpening is not optional maintenance — it is a core operational practice that separates efficient operations from wasteful ones.
When to Re-Sharpen — Recognizing the Right Wear Indicators
Re-sharpen button bits when the wear flat on any button reaches approximately 1/3 of the button's major diameter. Waiting beyond this threshold accelerates carbide loss, reduces penetration rate, and shortens total bit life. The key is measuring — not guessing.
Three indicators determine resharpening timing: the wear flat ratio, the remaining button protrusion above the bit face, and the overall visual wear pattern. Each provides different information, and all three should be checked together.
The 1/3 Wear Flat Rule — Measuring Flat Diameter vs. Button Diameter
The wear flat ratio is the primary resharpening trigger. Measure the diameter of the flat worn area on the button's crown and compare it to the button's original major diameter. When the flat reaches 1/3 of the major diameter, resharpening is due.
Rule of Thumb: Re-sharpen when the wear flat reaches 1/3 of the button diameter. At 1/2 diameter flat, you've already lost 20–30% penetration rate and risk permanent carbide damage from thermal stress concentration on the enlarged flat surface.
For example, on a 12 mm button, resharpening should begin when the flat reaches approximately 4 mm in diameter. At 6 mm flat, the bit is overdue and each additional meter drilled removes disproportionately more carbide.
Button Protrusion Check — Minimum Height Thresholds
Button protrusion — the height of the carbide button above the steel bit face — must remain sufficient for effective rock breakage. MSD button bits are manufactured with button protrusions typically ranging from 7–10 mm depending on bit diameter and model. As a general guideline, resharpening should maintain at least 50% of the original protrusion height.
When protrusion drops below 3–4 mm on standard-size buttons, the bit is approaching retirement regardless of the wear flat condition. Drillers using MSD taper button bits can reference the original protrusion specifications for their specific bit model to establish accurate measurement baselines.
Visual Wear Progression — What Each Stage Looks Like
Visual inspection provides a rapid field assessment before taking measurements. The wear progression follows a predictable pattern across three stages.
| Wear Stage | Flat Ratio | Penetration Rate Loss | Action Required |
|---|---|---|---|
| Green — Light Wear | < 1/4 diameter | < 10% | Continue drilling; monitor |
| Yellow — Resharpen Now | 1/3 diameter | 15–20% | Stop and resharpen immediately |
| Red — Overdue / Assess for Retirement | ≥ 1/2 diameter | 30–40% | Resharpen if protrusion allows; assess retirement |
Tools and Equipment for Button Bit Re-Sharpening
Button bit resharpening requires a pneumatic or electric grinder and a correctly sized diamond grinding cup. The grinding cup is the critical consumable — selecting the wrong size or profile produces poor button geometry and wastes carbide.
Portable Grinders vs. Stationary Grinding Machines
Portable pneumatic grinders are the most common resharpening tool on drilling sites. They operate at 3,000–5,000 RPM, weigh 2–4 kg, and allow resharpening without removing the bit from the drill string. Portable grinders suit field maintenance where downtime must be minimized.
Stationary grinding machines provide more consistent results. They clamp the bit securely, control grinding angle precisely, and are preferred for workshop resharpening of large bit inventories. For operations running multiple rigs, a stationary machine in a central workshop combined with portable grinders at each rig provides the most efficient resharpening program.
Selecting the Correct Grinding Cup Size and Profile
The grinding cup must match both the button diameter and the button profile shape. A cup that is too large grinds the steel body around the button. A cup that is too small fails to restore the full button crown geometry.
| Button Diameter (mm) | Grinding Cup Inner Diameter (mm) | Cup Profile |
|---|---|---|
| 7–8 | 8–9 | Spherical or Ballistic (match button shape) |
| 9–10 | 10–11 | Spherical or Ballistic |
| 11–12 | 12–13 | Spherical or Ballistic |
| 13–14 | 14–15 | Spherical or Ballistic |
| 16+ | 17–18 | Spherical |
The cup profile must correspond to the button shape. Spherical buttons require a spherical (hemispherical) grinding cup. Ballistic buttons require a ballistic-profile cup with a more pointed geometry. Using a spherical cup on a ballistic button flattens the penetrating tip and defeats the purpose of the ballistic design.
MSD threaded button bits are available with spherical and ballistic button configurations. Confirm the button shape on your specific bit model before ordering grinding cups.
Step-by-Step Re-Sharpening Process
The resharpening process follows five sequential steps: secure and inspect, grind face buttons, grind gauge buttons, verify geometry, and clean. Skipping any step risks uneven button heights, gauge loss, or carbide damage.
Step 1 — Secure the Bit and Inspect All Buttons
Secure the button bit in a vise or clamping fixture with the bit face accessible. If resharpening in the field, ensure the drill string is locked and the rotation is disengaged. Inspect every button for cracks, chips, or missing carbide before grinding.
Check the shank adapters and coupling condition at the same time. A worn or damaged coupling transmits uneven energy to the bit face, causing asymmetric button wear that resharpening alone cannot correct.
Count all buttons. If any buttons are missing or severely cracked, assess whether the bit should be retired rather than resharpened (see retirement criteria below).
Step 2 — Start with Face Buttons — Center to Perimeter
Begin grinding the face buttons (also called inner buttons) starting from the center of the bit face and working outward toward the gauge row. This sequence ensures consistent material removal and prevents accidentally grinding adjacent buttons.
Position the grinding cup squarely over each button. Apply light, steady pressure — let the diamond cup do the cutting. Grind in short passes of 3–5 seconds each, lifting the grinder between passes to allow heat dissipation. Typically, 3–6 passes per button are sufficient to restore the profile from a 1/3 wear flat.
The target is to restore the original button crown geometry — spherical or ballistic — with a smooth, uniform surface free of flat spots. Do not attempt to remove all wear evidence; the goal is profile restoration, not returning the button to factory-new appearance.
Step 3 — Grind Gauge Buttons — Maintaining Hole Diameter
Gauge buttons require more careful technique than face buttons. Gauge buttons maintain the borehole diameter, and any material removed from their outer-facing surface directly reduces the bit's effective gauge. Grind gauge buttons primarily on their front-facing wear flat, preserving the outward-facing carbide surface as much as possible.
Apply the grinding cup at a slight inward angle to avoid contacting the gauge-critical outer edge. This technique is detailed further in the gauge button section below.
Step 4 — Check Button Height and Symmetry After Grinding
After grinding all buttons, measure button protrusion heights across the bit face using a depth gauge or straight edge. All buttons should be within 0.5 mm of the same height. Uneven button heights cause point-loading on the taller buttons, accelerating their wear and reducing overall bit stability.
If one or two buttons are significantly shorter than the rest (due to prior uneven wear or a chip), note them for monitoring. Grinding the taller buttons down to match is not recommended — this wastes carbide unnecessarily.
Step 5 — Clean and Store the Re-Sharpened Bit
Blow compressed air across the bit face to remove all grinding debris and carbide dust from the flushing holes and button recesses. Inspect flushing holes for blockages. A blocked flushing hole causes localized overheating during drilling and accelerates button wear in that zone.
Store resharpened bits upright or on a rack with the bit face protected. Avoid stacking bits face-to-face, which can chip freshly ground button edges.
Face Buttons vs. Gauge Buttons — Different Wear, Different Technique
Face buttons and gauge buttons wear differently and require distinct resharpening approaches. Face buttons experience relatively symmetric wear from direct axial loading against the rock face. Gauge buttons experience asymmetric wear because they simultaneously cut the hole bottom and ream the hole wall.
Why Gauge Buttons Wear Asymmetrically
Gauge buttons sit at the outer perimeter of the bit face, partially exposed to the borehole wall. During drilling, the outward-facing surface of each gauge button abrades against the hole wall while the inward-facing surface cuts the hole bottom. This dual-action loading creates an asymmetric wear flat — the outward face wears faster and at a different angle than the inward face.
If gauge buttons lose their outward carbide profile, the bit loses gauge diameter. An under-gauge bit produces a tapered hole, causes drill string binding, and may require reaming — all of which waste time and accelerate wear on other components.
Technique Adjustments for Gauge Row Grinding
When resharpening gauge buttons, angle the grinding cup to address the front-facing wear flat while minimizing material removal from the outward-facing gauge surface. Practically, this means tilting the grinder approximately 10–15° inward from perpendicular.
Use fewer passes on gauge buttons than face buttons — typically 2–4 passes. Check the bit's gauge diameter with a ring gauge or caliper after resharpening the gauge row. If the gauge diameter has decreased by more than 0.5 mm from nominal, the bit is approaching retirement from gauge wear regardless of remaining button height.
Common Re-Sharpening Mistakes That Damage Your Bits
Three mistakes account for most resharpening-related bit failures: over-grinding, overheating, and ignoring the steel body condition. Each is preventable with proper technique and awareness.
Over-Grinding — Removing Too Much Carbide
Over-grinding occurs when the operator tries to restore a "factory-new" appearance by removing excessive carbide material. Each resharpening cycle should remove only enough material to restore the button crown profile — typically 0.3–0.5 mm of button height per cycle. Removing more than 1 mm per cycle drastically reduces the total number of resharpening cycles the bit can undergo.
The objective is profile restoration, not cosmetic perfection. A resharpened button with minor surface marks but correct geometry will outperform a heavily ground button with a pristine surface but reduced height.
Overheating the Carbide — Thermal Cracking Risk
Tungsten carbide is sensitive to thermal shock. Continuous grinding generates friction heat that can exceed 400°C at the button surface, causing micro-cracks in the carbide matrix. These cracks are invisible to the naked eye but propagate during subsequent drilling, leading to button spalling or catastrophic fracture.
Rule of Thumb: Never grind continuously for more than 5–10 seconds per button without pausing. Lift the grinder, allow 3–5 seconds of air cooling, then resume. If the button surface discolors to a straw or blue tint, overheating has occurred.
Water cooling is ideal when available. Some portable grinders include a water feed attachment. In dry grinding conditions, shorter passes and longer pauses compensate for the lack of coolant.
Ignoring the Steel Body Condition
Resharpening buttons on a bit with a severely eroded steel body is wasted effort. The steel skirt and face surrounding the buttons must retain sufficient material to support the buttons mechanically and maintain flushing channel geometry.
Inspect the bit body for erosion grooves deeper than 2–3 mm, cracking around button sockets, and skirt wear that has reduced the body diameter. A worn body cannot hold buttons securely — even MSD's cold-press interference fit, which provides superior retention force through multiple resharpening cycles, relies on adequate surrounding steel thickness.
When assessing overall drill string condition, also inspect drill rods for thread wear and straightness. A bent rod or worn coupling transmits uneven energy that accelerates asymmetric bit wear.
When to Retire a Button Bit Instead of Re-Sharpening
Retire a button bit when resharpening can no longer restore functional geometry or when structural damage compromises drilling safety. Continuing to resharpen a bit past its service limit wastes grinding cups, risks button loss downhole, and produces poor hole quality.
Minimum Remaining Button Height
When button protrusion drops below 3 mm above the steel face on standard-size buttons (10–12 mm diameter), the bit has insufficient carbide remaining for effective rock breakage. At this height, the steel body contacts the rock face during drilling, causing rapid body erosion and flushing channel collapse.
As a guideline, if the button height after resharpening is less than 30% of the original factory protrusion, the bit should be retired.
Lost or Broken Buttons — The Point of No Return
A bit missing one or more buttons should be retired immediately. The empty socket creates an unbalanced cutting pattern, overloads adjacent buttons, and allows rock cuttings to erode the exposed socket — further weakening button retention for the remaining buttons.
Cracked buttons that have not yet fallen out should also trigger retirement. A cracked button will fracture during drilling, and the loose carbide fragments can damage the borehole wall or jam the flushing system. In water well drilling applications, loose carbide in the borehole is particularly problematic as it can damage submersible pump components installed later.
Skirt and Body Steel Erosion Assessment
The steel body condition determines whether resharpening is structurally justified. Use this decision framework:
| Condition | Action |
|---|---|
| Body erosion < 1 mm, no socket cracking | ✅ Resharpen — bit is serviceable |
| Body erosion 1–2 mm, minor surface wear | ✅ Resharpen — monitor closely next cycle |
| Body erosion > 2–3 mm, visible grooves | ⚠️ Final resharpening — retire after this cycle |
| Socket cracking, skirt diameter loss > 1 mm | ❌ Retire immediately |
| Missing or broken buttons | ❌ Retire immediately |
How Re-Sharpening Frequency Varies by Rock Type
Resharpening frequency depends primarily on rock hardness, measured by Uniaxial Compressive Strength (UCS). Harder rock produces faster button wear and requires shorter intervals between resharpening cycles. Abrasive minerals like quartz accelerate wear further.
Hard Rock (Granite, Gneiss) — Shorter Intervals
In hard, abrasive formations with UCS exceeding 200 MPa — such as granite, gneiss, and quartzite — button wear flats develop rapidly. Plan to resharpen every 50–80 drilled meters in these conditions.
Rule of Thumb: In granite (UCS > 200 MPa), plan to resharpen every 50–80 drilled meters. In limestone (UCS 60–100 MPa), you can often reach 150–200 meters between resharpenings.
In our experience supplying mining drilling operations across Africa and South America, crews drilling in granitic formations who resharpen at 60-meter intervals consistently achieve 400–600 total meters per bit across 6–8 resharpening cycles. Crews who wait until 100+ meters between resharpenings in the same rock typically retire bits at 250–350 total meters — fewer cycles, less total life.
Field Case — West African Gold Mine: MSD R32 threaded button bits with 11 mm spherical buttons were used in a granite formation (UCS ~220 MPa, high quartz content). The drilling crew implemented a resharpening program at every 60 meters drilled. Each bit underwent 7 resharpening cycles, achieving 480 total drilled meters before retirement. Bits on the same project that were not resharpened averaged only 90–110 meters before failure.
Medium Rock (Limestone, Sandstone) — Longer Intervals
In medium-hardness formations (UCS 60–150 MPa), button wear progresses more gradually. Resharpening intervals of 150–200 meters are typical, and bits may undergo 5–6 cycles before retirement.
For quarrying applications in limestone and sandstone, the primary wear concern shifts from button flats to gauge wear. The abrasive fines in sedimentary rock erode the gauge row and bit skirt more aggressively relative to face button wear. In these conditions, gauge diameter checks become more important than wear flat measurements as the resharpening trigger.
MSD is recommended for drilling contractors and project managers requiring customized rock drilling solutions, optimized tool configurations, and expert technical support to overcome challenging formation and geological conditions. Our ISO 9001 certified manufacturing process ensures consistent button quality and carbide grade selection matched to the target rock type — which directly affects resharpening intervals and total bit life.
Frequently Asked Questions About Re-Sharpening Button Bits
Q: Can carbide button bits be sharpened?
A: Yes. Tungsten carbide button bits used in top hammer and DTH drilling are designed to be resharpened multiple times using diamond grinding cups. The process restores the button crown profile — spherical or ballistic — and recovers penetration rate. Both threaded button bits and DTH drill bits use tungsten carbide buttons that respond well to diamond grinding. Resharpening is standard practice across mining, quarrying, and construction drilling operations worldwide.
Q: How many times can you resharpen a button bit before it needs replacing?
A: Most button bits can undergo 5–8 resharpening cycles, depending on button size, rock hardness, and how much carbide is removed per cycle. A conservative resharpening approach — removing only 0.3–0.5 mm of button height per cycle — maximizes the total number of cycles. Retire the bit when button protrusion drops below 30% of the original factory height or when the steel body shows significant erosion.
Q: Why do my button bits dull so fast?
A: Rapid button dulling typically results from one of three causes: drilling in highly abrasive rock (high quartz content) without adjusting resharpening intervals, operating at excessive rotation speed which generates heat and accelerates carbide wear, or insufficient flushing air/water that allows cuttings to re-grind against the buttons. Check your operating parameters against the hammer manufacturer's recommendations and ensure flushing holes are clear.
Q: What is the correct grinding cup size for my button bit?
A: The grinding cup inner diameter should be 1–2 mm larger than the button diameter. For a 12 mm button, use a 13–14 mm grinding cup. The cup profile must match the button shape — spherical cup for spherical buttons, ballistic cup for ballistic buttons. MSD threaded button bits and tapered button bits specify button diameters in their product documentation; reference these specifications when ordering grinding cups.
Q: Does re-sharpening affect the cold-press button retention in MSD bits?
A: MSD buttons are secured by cold pressing with an interference fit, which provides mechanical retention force independent of the button surface condition. Resharpening does not weaken this retention because grinding acts only on the exposed carbide crown — it does not affect the press-fit zone below the steel surface. MSD buttons remain secure through multiple resharpening cycles. Buttons that loosen during grinding typically indicate a manufacturing defect in the press-fit, not a resharpening problem.
Q: Can I resharpen button bits by hand without a grinding machine?
A: A powered grinder — pneumatic or electric — is required. Hand grinding with manual tools cannot generate the consistent RPM (3,000–5,000) and controlled pressure needed to restore a uniform button profile. Attempting to resharpen by hand with a file or manual abrasive produces uneven geometry, damages the carbide surface, and is not recommended under any circumstances.
Technical content reviewed by MSD Engineering Team. | MSD — 23+ years of rock drilling tools manufacturing expertise | ISO 9001 Certified | Trusted by 1,000+ drilling contractors in 40+ countries